How to Use Google My Maps for Travel Planning Like a Pro (2026 Guide)
The Reality Check: What This Tool Actually Does (and Doesn’t)
Google My Maps isn’t a replacement for live turn-by-turn navigation. It doesn’t pull real-time traffic, adjust for construction delays, or automatically reroute you around a closed I-80 lane. What it does brilliantly is spatial visualization. You can see clustering, estimate driving distances at a glance, and keep reservation codes, parking links, and backup options attached to specific coordinates.
According to Google’s current documentation and 2026 sync behavior, maps stay static once saved to the Google Maps app. That means any edits you make after the initial sync won’t reflect offline until you reconnect to Wi-Fi and trigger a manual refresh. One thing many people notice when testing this in rural areas or national parks: your pins stay visible, but satellite layers and third-party place details drop out. Plan accordingly.
Core Guide: Building a Map That Actually Works on the Ground
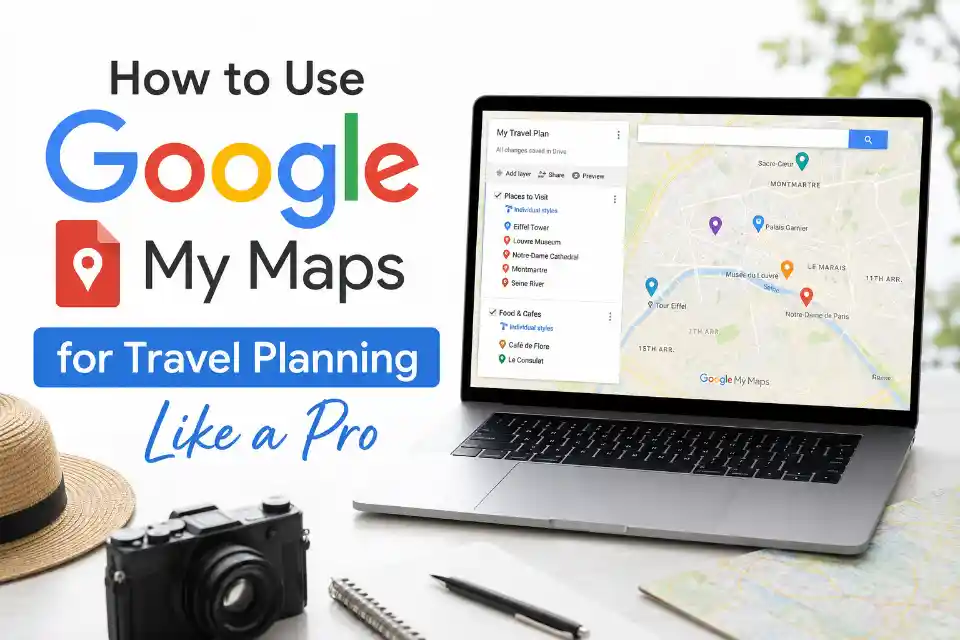
1. Start Clean, Name Smart
Skip the generic “Summer Trip” title. Use a structure that tells you what’s inside at a glance: 2026 Southwest | Route A | Food/Scenic/Backup. Clear naming matters when you’re sharing with family or referencing it mid-drive.
2. Layers Are Your Workflow Backbone
Don’t dump everything into one bucket. Create layers that match your decision-making:
- Must-See: Non-negotiables
- Flexible Stops: Weather/time dependent
- Logistics: Gas, EV chargers, park visitor centers
- Backups: For when places are unexpectedly closed
Based on US park reservation patterns in 2025–2026, having a Backups layer prevents the panic of arriving at a fully timed-entry system. Keep it light. Three to five entries are usually enough to pivot without derouting your whole day.
3. Add Data the Right Way
Search, click, or drop coordinates directly. But the real value lies in the notes field. Attach:
- Direct reservation URLs
- Parking lot coordinates: Main entrances often sit far from actual lots
- Alternate hours or seasonal closures
- A one-line rationale (“Good for lunch, but skip if we’re behind schedule”)
4. Icons and Colors That Serve a Purpose
You don’t need twelve custom symbols. Pick three to four high-contrast options that read well on sunlight-washed phone screens. A common mistake I’ve seen is using pale yellow for markers or relying on tiny custom logos that turn into smudges at zoom. Stick to Google’s built-in pin set, group by category, and keep it readable.
5. Sync Before You Leave
Open Google Maps on your phone, tap saved, scroll to maps, and select your My Maps project. Toggle offline access for the regions you’ll cover. Test it in airplane mode before you hit the road.
Practical Systems: The Triage Method for Day-Of Use
Having a map is only half the work. Using it well requires a simple daily routine:
Night Before Triage (10–15 mins): Open the app while plugged in. Check tomorrow’s cluster. Delete pins that no longer make sense logistically. Reorder your Flexible Stops based on weather or reservation confirmations.
Morning Routing Check: Use regular Google Maps for live traffic. Cross-reference with your My Maps layer to ensure you’re hitting logical clusters, not zigzagging across a metro area.
On-Road Quick Edits: If a location closes or a road detour appears, drop a quick pin on the fly. These edits sync when you regain signal and save you from repeating mistakes on future trips.
If you’re navigating US highway corridors or mountain passes, pre-load toll transponder info in your logistics layer. It sounds minor until you hit an EZ-Pass or Pay-By-Plate discrepancy and realize your original route assumed otherwise.
What Most Travel Blogs Get Wrong About Google My Maps
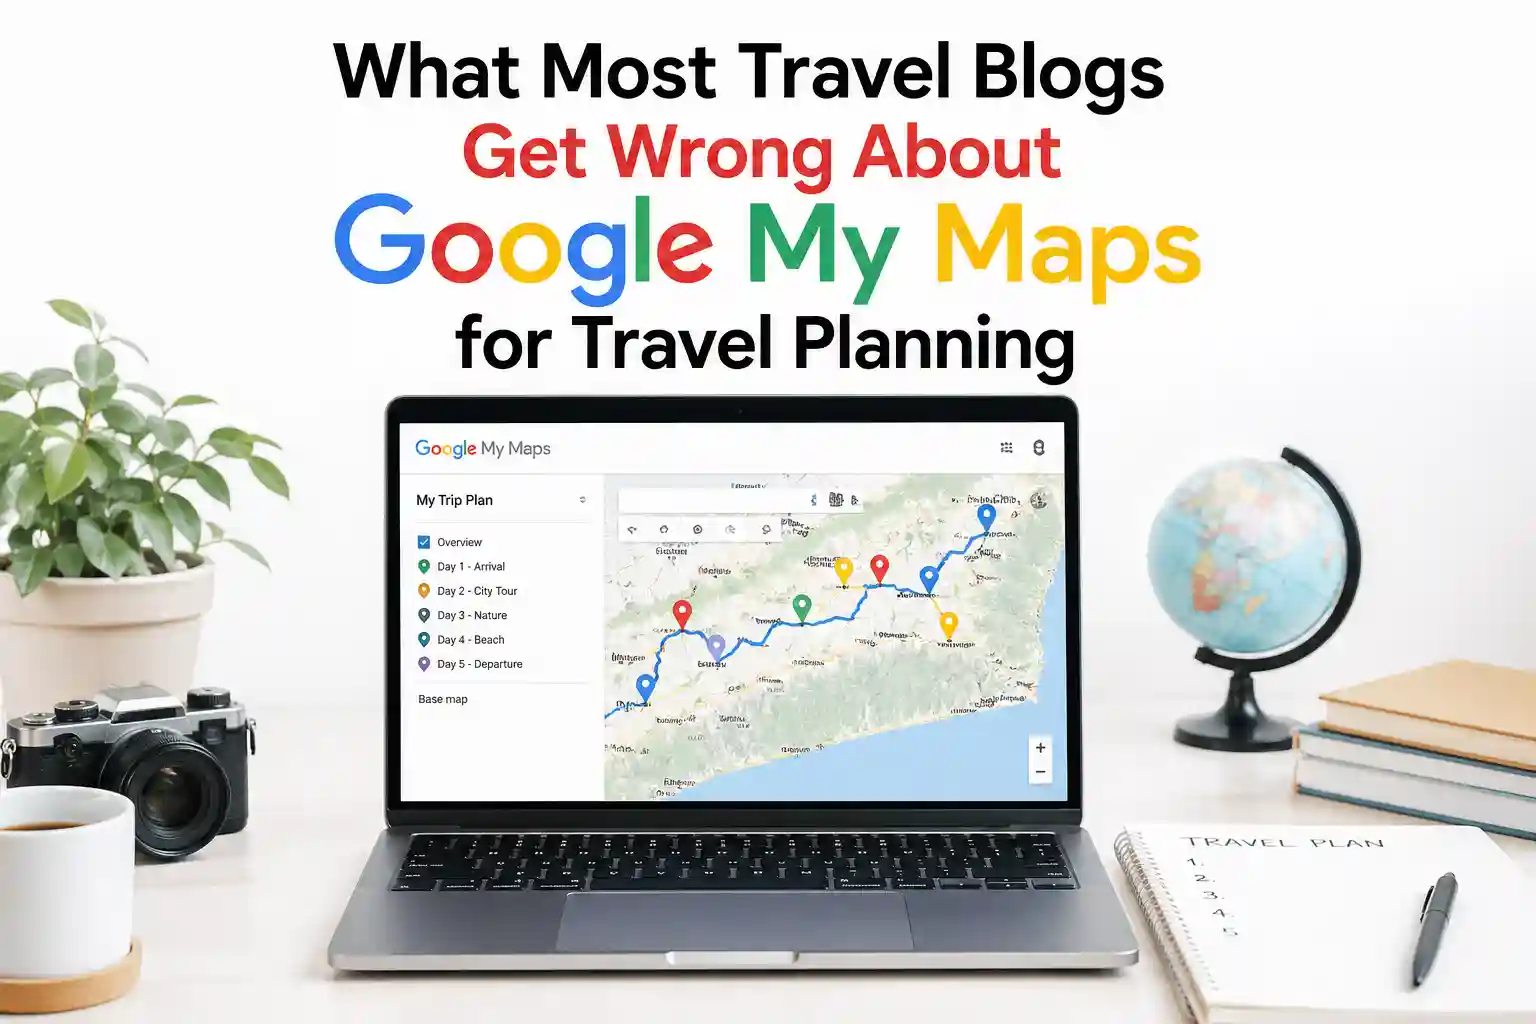
You’ll see endless articles telling you to “color-code every pin” or “use it for daily routing.” That’s surface-level advice that breaks down in reality. My Maps isn’t built for algorithmic optimization. It’s a visual spreadsheet. Trying to force it to act like Waze or a dedicated itinerary planner will leave you frustrated.
The better insight? Use it for spatial triage, not navigation. Drop pins to see geographic clusters, estimate realistic drive windows, and attach critical details you’d otherwise lose in a notes app. When you treat it as a decision-support layer rather than a turn-by-turn replacement, the tool suddenly does what it’s actually good at.
Another common oversimplification: assuming more pins equals better planning. In most cases, past 50–70 pins per layer, mobile rendering slows down noticeably, especially on older phones. Trim the fat. Quality over quantity isn’t just a mantra; it’s a performance requirement.
Common Mistakes (That Quietly Wreck Trips)
Overstuffing Layers: Past 60 pins per layer, scrolling becomes sluggish on average smartphones. Keep layers focused.
Assuming Full Offline Functionality: Map tiles, custom icons, and notes sync, but third-party business info doesn’t. Download standard offline Google Maps tiles separately for the same region.
Ignoring Share Permissions: Family members often view maps as “read only” because you forgot to toggle editing access. Check Share settings and use “Anyone with the link” or invite specific emails ahead of time.
Skipping the Parking Note Field: Arriving at a trailhead only to find the nearest legal lot is a mile away kills momentum. Add coordinates for actual parking, not just the attraction entrance.
Relying on Default Search Results: Many “scenic overlooks” or “best lunch spots” are SEO-inflated. Cross-check with recent reviews or state tourism boards before saving.
Scenario-Based Advice: Tailoring the Map to Your Trip Type
Cross-Country Road Trips (I-10, I-80, Route 66 segments): Focus on logistics layers: fuel stops, rest areas with EV charging, overnight buffers, and weather-vulnerable mountain passes. Space pins roughly every 3–4 hours. You’ll want this, especially if you’re towing or managing pet stops.
City Hopping (NYC, Chicago, Austin, Denver): Cluster by neighborhood, not attraction. Public transit and walkability change how you move. Pin your accommodation, nearest transit hubs, 2 backup dining options per area, and any timed-entry museum tickets. Keep layers tight—under 40 pins total for smooth mobile performance.
National Park & Backcountry Circuits: Cell service gaps are the rule, not the exception. Pre-save all trailheads, ranger station numbers, and permit pickup locations in the notes. Based on 2026 NPS reservation patterns, many high-demand parks now require day-use permits during peak weekends. Link those directly.
Multi-Generational Family Trips: Add accessibility notes, restroom coordinates, and medical/urgent care pins nearby. Pace your clusters around midday breaks. One thing many families underestimate is how much extra buffer a good parking pin can save when managing strollers or mobility devices.
Cost / Time / Effort Breakdown
This isn’t about spending money. It’s about investing time upfront to buy back hours on the ground.
| Setup Time | 2–4 hours for a 7–10 day US itinerary. Most of that is research, not map-building. |
| Daily Maintenance | 10–20 minutes the night before. |
| Effort Curve | Front-loaded. The first map takes longer. Once you establish a template (layers, naming, notes format), subsequent trips drop to under an hour. |
| Cost | Free. Google My Maps has no subscription tier. |
| ROI | Reduced on-trip decision fatigue, fewer missed reservations, more realistic pacing, and roughly 1–3 hours saved per trip from unnecessary backtracking. |
FAQ: What Travelers Actually Ask
Does Google My Maps work offline in 2026? Yes, but selectively. Pins, custom layers, and notes sync when you save the map in the Google Maps app. Satellite imagery and live place details do not. Download standard offline maps for the same region as a backup.
What’s the practical pin limit before it lags? Google doesn’t publish a hard cap, but real-world testing shows noticeable slowdown around 80–100 markers on a single layer on average smartphones. Keep layers under 60 pins for smooth scrolling.
Can I import a spreadsheet or CSV? Absolutely. Use columns for Name, Address/Coordinates, Description (notes), and Icon Style. Clean formatting before upload prevents sync errors.
Should I plan by day or by region? Region first, day second. Geographic clustering beats arbitrary calendar splits. Once you see the natural clusters, assign days based on realistic drive times and reservation windows.
Practical Recommendations
What tends to work best in real travel is restraint, not maximum data. In most cases, I tell travelers to cap their initial map at 30–40 carefully chosen pins rather than a sprawling archive. What I usually recommend is treating your Logistics layer as the most important one you build. Gas, parking, EV chargers, and visitor centers dictate your actual movement more than scenic pull-offs ever will.
A common mistake I’ve seen is planning in a vacuum. Always cross-reference your My Maps clusters with live routing the morning of. Cell service, road closures, and unexpected wait times change faster than any static map can predict. Keep your notes field lean: one reservation link, one parking coordinate, one backup option. Anything more becomes noise.
Leave a Reply